
This is a simple blog to help you get started with User Authentication in Nextjs using Next-Auth. Let’s begin
Installing NextAuth.js
You can install NextAuth using this command:
npm install next-authAdding the API Route
NextAuth uses next’s API routes and this is extremely easy to set up.
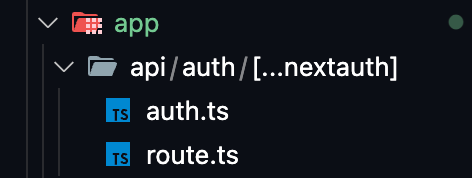
In your app folder Add this directly (it is case-sensitive):
app/api/auth/[...nextauth]Then add two files in the […nextauth] folder:
- auth.ts
- route.ts
Your directory should look like this now:
Auth.js
Add this code in Auth.js:
import type { NextAuthOptions } from "next-auth";
import { getServerSession } from "next-auth";
import AzureADProvider from "next-auth/providers/azure-ad";

const authOptions: NextAuthOptions = {
  providers: [
    AzureADProvider({
      clientId: process.env.AZURE_AD_CLIENT_ID as string,
      clientSecret: process.env.AZURE_AD_CLIENT_SECRET as string,
      tenantId: process.env.AZURE_AD_TENANT_ID,
    }),
  ],
};

const getSession = () => getServerSession(authOptions);

export { authOptions, getSession };
Explanation:
- NextAuthOptions is to add the type hint for TypeScript
- getServerSession is the object to get user data when a user is logged in
- authOptions provide all the providers and extra options to NextAuth
- providers is the list of all authentication methods you want to have. I have Azure AD as my provider but you can choose from the many providers NextAuth has or even have a custom one.
Route.js
import NextAuth from "next-auth/next";
import { authOptions } from "./auth";

const handler = NextAuth(authOptions);

export { handler as GET, handler as POST };- authOptions is what we created in auth.ts
- handler is a function NextAuth uses in the back end, we don’t need to use it
Adding the API route to the website
Now that we’re done with the API route, let’s add it to the entire website.
In layout.tsx you’re supposed to add a component to provide the NextAuth user session to all the body’s children. In reality, this is a client-side component so we can’t directly add it to the layout.tsx . So, we create another component.
In your app directory, on the same level as layout.tsx create a file called providers.tsx. It should look like this:
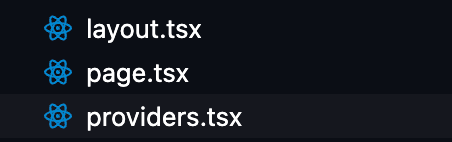
providers.tsx
"use client";

import type { Session } from "next-auth";
import { SessionProvider } from "next-auth/react";

export default function Providers({
  session,
  children,
}: {
  session: Session | null;
  children: React.ReactNode;
}) {
  return <SessionProvider session={session}>{children}</SessionProvider>;
}
We get the SessionProvider component from next-auth and wrapping the children with it.
Now we import this into layout.tsx
import type { Metadata } from "next";
import "./globals.css";
import { getSession } from "./api/auth/[...nextauth]/auth";
import Providers from "./providers";

export const metadata: Metadata = {
  title: "Next Authentication Example",
  description: "Next Authentication Example",
};

export default async function RootLayout({
  children,
}: Readonly<{
  children: React.ReactNode;
}>) {
  const session = await getSession();
  return (
    <html lang="en">
      <body>
        <Providers session={session}>
          <main>
            {children}
          </main>
        </Providers>
      </body>
    </html>
  );
}
We get the current session using getSession , then we pass it to the Providers component which is wrapping our children
Adding authentication to specific routes
Maybe you only need user auth for only some routes and not all of them. You use next’s middle ware for this.
In your src folder on the same level as your app folder, add the middleware.ts file. It should look like:

Then you simply add:
export { default } from "next-auth/middleware";
export const config = {
  matcher: ["/resources", "/user"],
};
In your matcher, you add all the routes that you want authorized. If you want the user to be authorized for every route, remove the config from the file entire. So it looks like:
export { default } from "next-auth/middleware";Adding sign in and sign out buttons
In any page or component you want, simply import the signIn and signOut functions and attach them to buttons. Make sure that you have “user client” at the top.
For example, something like this:
"use client";
import React from "react";
import { useSession, signIn, signOut } from "next-auth/react";

const Login = () => {
  const { data: session } = useSession();

  return (
    <main>
      <h2>
        {session
          ? `Signed in as ${session?.user?.email}`
          : "Please Sign In"}
      </h2>
      <button
        onClick={() => (session ? signOut() : signIn())}
      >
        {session ? "Sign out" : "Sign in"}
      </button>
    </main>
  );
};

export default Login;
Using the useSession( ) function
You can pretty much use the useSession() function in any component you want to get the current user. All you need is to import it and add
const {data: session} = useSession();Then you can run database queries based on the user data, add a profile component or anything you’d need.